Microsoft Word remains one of the most popular word processing applications today. It allows users to handle a wide variety of documents through its robust set of features, including the powerful tools found within the Mailings tab.
Before you start drafting your next document, it’s a good idea to familiarize yourself with the ribbon menus and their specific icons. Understanding these functions beforehand ensures a smoother workflow and prevents any “what does this button do?” moments while you’re in the middle of a project.
In my previous articles, I’ve covered the Home, Insert, Layout, Design, and References tabs. Today, we’re focusing on the functions of the Mailings menu in Microsoft Word—whether you’re using version 2007, 2010, 2013, 2016, 2019, or the latest Microsoft 365. Let’s get into it.
The Microsoft Word Mailings Tab and Ribbon
For many users, the Mailings tab might seem like a secondary feature. Unlike the high-traffic Home or Insert tabs, it is often overlooked because many people still prefer to format their letters manually. However, if you are looking to boost your productivity, this tab is a game-changer.
Broadly speaking, the Mailings tab is designed for Mail Merge—a process that allows you to create mass mailings (like letters or labels) where the format and content remain the same, but the recipient information changes.
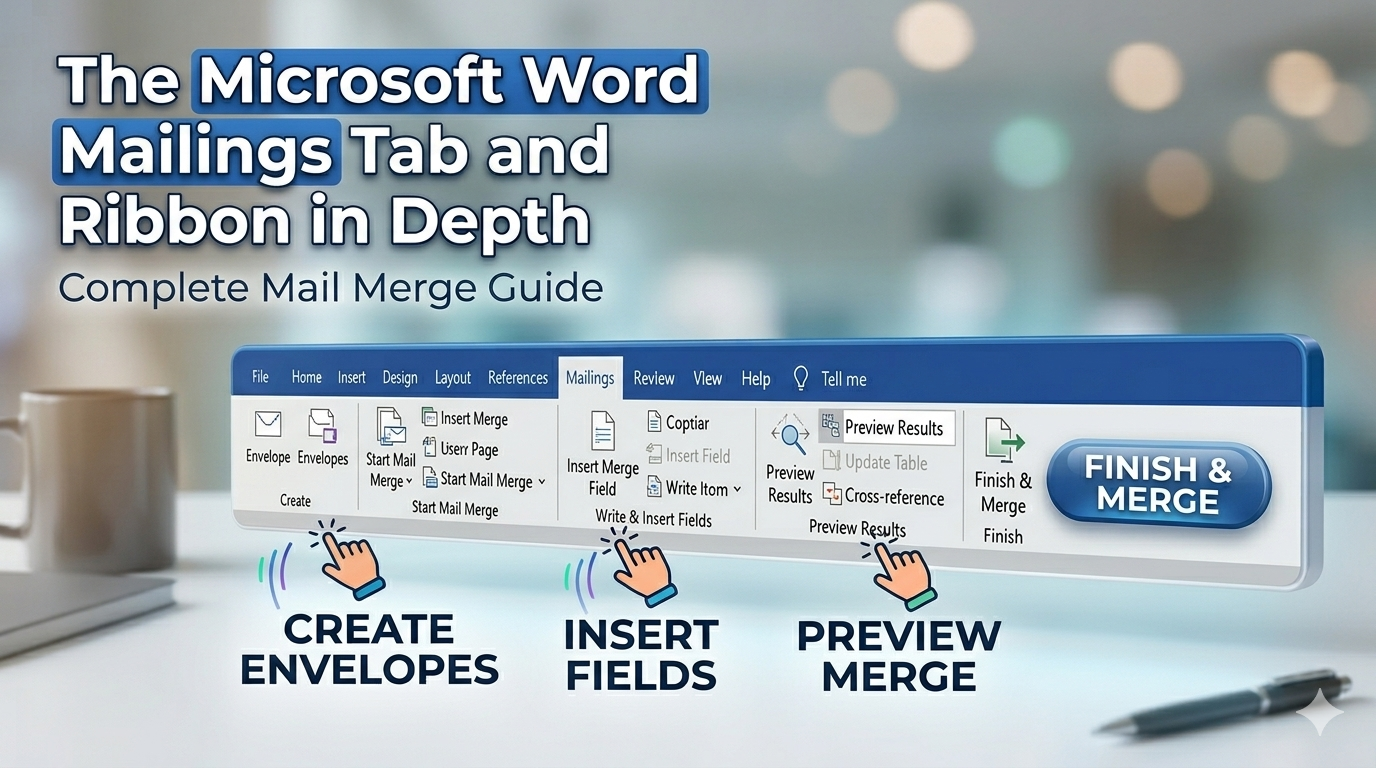
The Mailings ribbon is organized into five main groups: Create, Start Mail Merge, Write & Insert Fields, Preview Results, and Finish. Each group contains specific tools to help you manage your professional correspondence.
Here is a breakdown of the icons within the Microsoft Word Mailings menu:
1. Create
- Envelopes: Allows you to create and format professional envelopes for mailing.
- Labels: Helps you design and print sheets of labels for packages or letters.
2. Start Mail Merge
- Start Mail Merge: The starting point for creating a single document to be sent to multiple people.
- Select Recipients: Allows you to choose your contact list or create a new one.
- Edit Recipient List: Lets you make changes to your list or select specific individuals to receive the mailing.
3. Write & Insert Fields
- Highlight Merge Fields: Highlights the specific areas in your document where recipient information will be inserted.
- Address Block: Automatically adds a formatted mailing address to your letter.
- Greeting Line: Adds a personalized greeting (like “Dear Mr. Smith,”) to the document.
- Insert Merge Field: Lets you manually add specific data points from your recipient list, such as last names, phone numbers, or company names.
- Rules: Allows you to set specific logic or conditions for the mail merge.
- Match Fields: Ensures that the field names in your list match the requirements of the document features.
- Update Labels: Synchronizes all labels in a document with the information from your recipient list.
4. Preview Results
- Preview Results: Swaps the merge fields with actual data from your list so you can see exactly how the finished document will look.
- First Record: Jumps to the very first recipient in your list.
- Previous Record: Moves back to the preceding recipient.
- Go to Record: Jumps to a specific entry in your list.
- Next Record: Moves forward to the next recipient.
- Last Record: Jumps to the final recipient in your list.
- Find Recipient: Searches for a specific person in your list to preview their specific document.
- Check for Errors: Runs a diagnostic to see how Word should handle any errors that might occur during the merge process.
5. Finish
- Finish & Merge: The final step where you choose how to complete the process—whether by printing the documents, sending them as emails, or editing individual letters.