
Microsoft Word remains the industry standard for word processing today. Throughout its history, it has powered document creation across various operating systems, including DOS, Apple Macintosh, SCO UNIX, OS/2, and of course, Microsoft Windows.
To truly Microsoft Word, you need to understand its robust feature set—specifically the tools tucked away in the View menu. Before diving into your next big project, familiarizing yourself with these menus and icons will streamline your workflow and keep you from second-guessing where specific functions are located.
While I have previously covered the Home, Insert, Design, Layout, References, Mailings, and Review tabs, today we’re focusing on the View Tab. Whether you’re using Word 2007, 2010, 2013, 2016, 2019, or the latest Microsoft 365 version, here is everything you need to know.
Understanding View Tab in Microsoft Word
In short, the View tab controls your workspace environment. It allows you to toggle visual aids like rulers and gridlines, adjust zoom levels, and manage how documents appear on your screen.
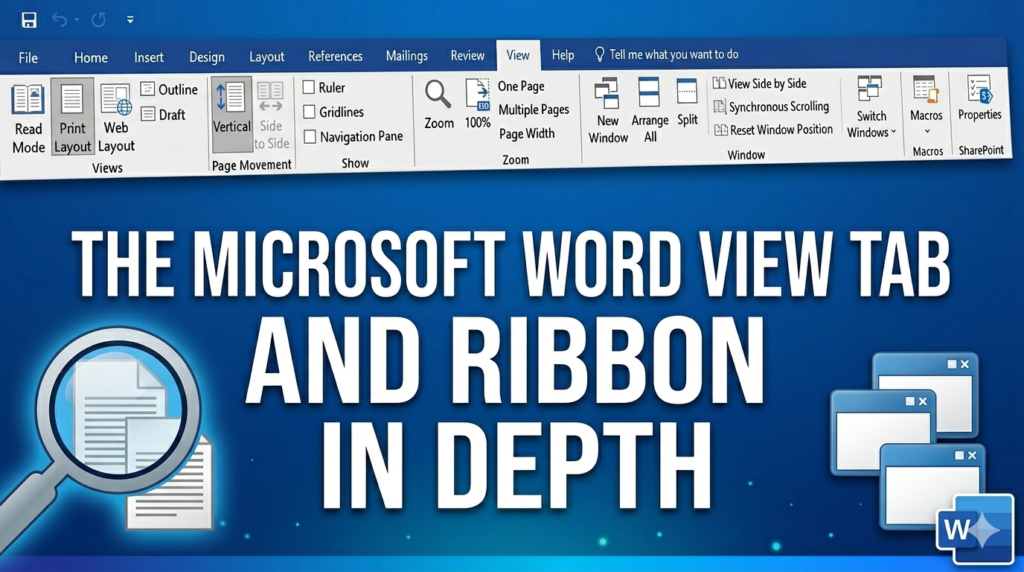
The View ribbon is organized into seven distinct groups: Views, Page Movement, Show, Zoom, Window, Macros, and SharePoint.
Here is a breakdown of the functions within each group:
1. Views
- Read Mode: Optimizes the document for on-screen reading by removing distractions.
- Print Layout: The default view; shows exactly how the document will look when printed.
- Web Layout: Displays the document as it would appear as a webpage.
- Outline: Breaks the document down into bulleted points, ideal for structuring long reports.
- Draft: A “text-only” view that allows for quick editing without focusing on margins or images.
2. Page Movement
- Vertical: The classic way to navigate by scrolling up and down.
- Side to Side: Turns your pages like a book, allowing you to flip through them horizontally.
3. Show
- Ruler: Toggles the horizontal and vertical rulers for precise margin and indent adjustments.
- Gridlines: Overlays a grid on the background, perfect for aligning objects, shapes, and images.
- Navigation Pane: Opens a sidebar to help you search for text or jump between headings and pages.
4. Zoom
- Zoom: Opens a dialog box to set a custom magnification level.
- 100%: Instantly resets the document to its standard size.
- One Page: Scales the document so a full page fits within the window.
- Multiple Pages: Shrinks the view so you can see several pages at once.
- Page Width: Zooms in so the width of the page matches the width of your screen.
5. Window
- New Window: Opens the same document in a second window, allowing you to work on different sections simultaneously.
- Arrange All: Tiles all open Word windows on your screen so you can see them all at once.
- Split: Divides the current window into two panes, let you scroll through two different parts of the same file.
- View Side by Side: Places two different documents next to each other for easy comparison.
- Synchronous Scrolling: When viewing side-by-side, this scrolls both documents at the same time.
- Reset Window Position: Re-centers your side-by-side windows to share the screen real estate equally.
- Switch Windows: Quickly jump between your currently open Word files.
6. Macros
- Macros: Accesses the list of macros to automate repetitive tasks.
7. SharePoint
- Properties: Allows you to view and edit document metadata when working within a SharePoint environment.